Showing posts with label Foil. Show all posts

Thursday, November 19, 2020

Handmade Holiday PaperCrafting Parade

Hello everyone!! Welcome to the Scrapbook.com Handmade Holiday Papercrafting Parade! Christmas is my favorite time of the year and I love making Christmas cards! So I had to jump in when I saw this hop :)


I have 3 projects for you today - let's take a look at them one by one.


My first card uses the Confetti stencil from Scrapbook.com and their Alphabet dies. I die cut circles using the WRMK Circle dies, from a red card stock and inked the edges with Hero Arts - Red Royal ink. This just adds a little dimension. Then I used the Confetti stencil to add some embossing ink to one part of the circle and embossed it with Hero Arts - Gold embossing powder. Now I foiled a piece of Adhesive Toner Sheet with Gold foil and die cut the letters NOEL on it. I adhered the letter on the circle. I took a card base and stamped the pine leaves from the Sunny Studio - Christmas Trimmings using Hero Arts Forever Green ink on the top. Then I arranged these ornaments and adhered them down. Then I adhered a bit of double sided tape on top of the ornaments and added gold foil on top. For the string , I used left overs of foiled toner sheet from cutting the letters, and cut it in to thin strips using my paper trimmer.


The second one is another Christmas card, for which I used a non-Christmas flower stamp. This layered Blossoms stamp set is a beautiful set which creates lovely layered flowers. I used Hero Arts inks to stamp the layers of the flowers on this cardstock panel. I used the Alphabet dies to die cut the letters JOY from Adhesive Toner Sheet and foiled it with Red foil. I added foil around the edge of the card base and adhered the panel with the tape runner. I adhered the foiled letters on it and added this sticker that said "Tidings of Comfort and Joy" from this Sticker book, after cutting off the 'Joy' from it.


The last one for today is a gift card holder. I had posted pics of this die on my Instagram stories and asked what I should be making with this snowflake die. One of the responses was to make a gift card holder, so here it is :) I die cut the snowflake on Adhesive Toner Sheet and foiled it with silver sketch foil. I made a gift card holder using Neenah cardstock panel. Using a double sided adhesive sheet, I foiled the entire front of the card with aqua foil and adhered the snowflake on top. I like how the snowflake extends beyond the front of the gift card holder.

How do you like my creations today? If you like them, please do check out the Handmade Holiday Papercrafting Parade on Instagram. You can go to my Instagram here. Thank you for stopping by! Have a great day and stay safe!!


Friday, October 25, 2019

Shaker Bookmark for Teacher

Hello everyone!! As you might already know, I'm guest designing for Doodles Paper Playground this month. Here's another post using one of the sparkle blends from this month:


A shaker bookmark for a teacher!! I cut plastic sleeves in to the size I wanted (roughly 1.4" x 6"). I laminated these pieces in the laminating pouch. I used 5" x 7" laminating pouches and it fit 3 bookmarks. Make sure to leave enough space between the plastic sleeve pieces so that when we cut them apart, the lamination still stays strong. After laminating, cut the individual pieces apart. Now you have a clear pouch that is closed on 3 sides. You can fill whatever you want, in it. I cut a piece of the Jeepers Creepers toner sheet from Brutus Monroe and foiled it with Red Static foil. I inserted the foiled transparent sheet in to the laminated pouch and added some of the Apple For Teacher sparkle blend. Then I sealed the 4th side with double sided adhesive tape. I trimmed the excess clear plastic. I used a double sided scotch tape to cover the 4th side and folded the scotch tape on to itself. Then I adhered Red Static foil on to it. Then I poked a hole and added a red and white baker's twine.

How do you like this shaker bookmark? Please do let me know in the comments below. Thank you for stopping by. Have a great day!!

Wednesday, October 23, 2019

Happiest Of Holidays

Hello everyone!! I'm on the Brutus Monroe blog today, with this Foiled Christmas card.


I started by foiling the toner sheet Peppermint Twist with the Red Static foil. I use my Scotch laminator for foiling. I let it get hot for about 30 mins before I send the sheet through. I heat embossed the sentiment from the Yuletide Greetings stamp set with Gilded embossing powder on vellum and wrapped it around the foiled panel. I adhered it on to an A2 card base.

How do you like this quick and easy Christmas card? Please do let me know in the comments. Thank you for stopping by. Have a great day!


Tuesday, October 22, 2019

Foiled Fall Leaves

Hello everyone!! Today is our blog hop day at Brutus Monroe and our theme for today is Deco Foil. Here's my card:


I foiled few pieces of adhesive Toner sheets with Orange Sketch, Gold Static and Green Sketch foil and then die cut them with Fall Leaf Dies and the Thanks die. I took an A2 piece of Brown Butter card stock and adhered double sided tape around the border. I adhered Gold Static foil on it. Then I adhered the die cut foiled leaves and the sentiment on it.

What do you think of this card? Please do let me know in the comments. Here's the hop line up for today:

Cassie
Lauren
Berina
Jessica

Thank you for stopping by today. Have a great day!!

Wednesday, September 18, 2019

Snowflakes

Hello everyone!!I'm on the Brutus Monroe blog today, with this foiled Christmas card.


I used the newest foil and designer toner sheets - the Gold static foil and the Winter Wonderland toner sheet. After foiling a piece of the toner sheet, I inked the sheet with Cabbage ink. I adhered double sided tape on to the card base and added foil to that to create a border. I adhered the foiled sheet on to the card base. I heat embossed the sentiment from Yuletide Greeting stamp set with Gilded Embossing powder.

This was a pretty quick and easy card, yet elegant and beautiful and Christmassy. What do you think?? Please do let me know! Thanks for stopping by. Enjoy your day!

Supplies:

Affiliate links are used
Yuletide Greetings - 6x8 Stamp Set

BM
Embossing Ink
Embossing Ink

BM
Mini Surface Ink Pad Collection: Fall

BM
Metallic Embossing Powder - Gilded

BM
Not Your Mama's Cardstock - Heavyweight

BM
Alabaster 110lb - Premium Cardstock

BM
Deco Foil™ Transfer Sheets

BM | TW

Brutus Monroe Foil Transfer Sheets 6" x 12" sheets - Gold Static

BM
Brutus Monroe Designer Toner Sheets - Winter Wonderland

BM
Glue
Glue

BM
Squeaky Clean Stamp Cleaner

BM
Squeaky Clean Stamp Scrubber

BM
Acrylic Block
Acrylic Block

BM
Embossing Heat Tool
Embossing Heat Tool

BM
Clear T Square
Clear T Square

BM
Fold and Score Tool
Fold and Score Tool

BM
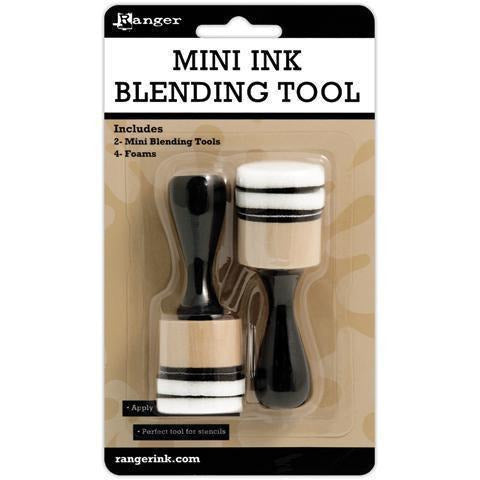
Mini Ink Blending Tool Kit

BM
Mini Ink Blending Tool Replacement Foams - 20 Pieces

BM
3D White Foam Squares • 1/2 in

BM | TW
Thermoweb - Purple Tape

BM | TW
Sticky Tape Mini Runner™

BM | TW
Brutus Monroe - Foam Tape - 36 Yards - 108 Feet

BM
Fussy Cutting Scissors

BM

Tuesday, September 17, 2019

Foiled Christmas Ornaments

Hello everyone!! Today's blog hop day at Brutus Monroe and our theme for today is Decorative Details.


I decided to make a shaker card with Brutus Monroe sequin mix. I used one of the newest toner sheet and foil transfer sheet for the shaker window. I used the Ornamental Designer Toner sheet with the Red Static foil. The sequins are from the Steampunk Inspiration Box. I used a shaker pouch to make this quick shaker card. I heat embossed the sentiment from Yuletide Greetings with Gilded embossing powder.

What do you think of this shaker foiled card? Please do let me know. Here's the hop order for today:

Vicki

Supplies:

Affiliate links are used
Yuletide Greetings - 6x8 Stamp Set

BM
Embossing Ink
Embossing Ink

BM
Metallic Embossing Powder - Gilded

BM
Not Your Mama's Cardstock - Heavyweight

BM
Alabaster 110lb - Premium Cardstock

BM
Deco Foil™ Transfer Sheets

BM | TW

Brutus Monroe Foil Transfer Sheets 6" x 12" sheets - Red Static

BM
Brutus Monroe Designer Toner Sheets - Ornamental

BM
Glue
Glue

BM
Squeaky Clean Stamp Cleaner

BM
Squeaky Clean Stamp Scrubber

BM
Acrylic Block
Acrylic Block

BM
Embossing Heat Tool
Embossing Heat Tool

BM
Clear T Square
Clear T Square

BM
Fold and Score Tool
Fold and Score Tool

BM
Mini Ink Blending Tool Kit

BM
Mini Ink Blending Tool Replacement Foams - 20 Pieces

BM
3D White Foam Squares • 1/2 in

BM | TW
Thermoweb - Purple Tape

BM | TW
Sticky Tape Mini Runner™

BM | TW
Brutus Monroe - Foam Tape - 36 Yards - 108 Feet

BM
Fussy Cutting Scissors

BM
Self Adhesive Shaker Pouch - 25 Pack

BM
Steampunk Sequins
Steampunk Sequins

BM