Showing posts with label scrapbookcom. Show all posts

Wednesday, February 24, 2021

Peony Bookmark

 Hello everyone!! Welcome back to my blog. Today, I'm sharing a bookmark that I made recently.

I took a panel of white card stock of size 1 3/4" x 5 1/2" and stamped the small floral image and leaves from the Altenew Peony Bouquet stamp set with Memento London Fog ink. I colored it with my Copics. Then I die cut the letter 'A' using the dies from Scrapbook.com. I made this bookmark for my daughter Amelia, so I used the letter A. I adhered the letter on to the panel. I adhered a panel of purple card stock behind this white panel. I laminated the entire thing and punched a hole on the top for the yellow ribbon. 


How do you like this bookmark? Please do let me know in the comments. Thank you for stopping by. Have a great day! 

Submitting this to:


Tuesday, December 15, 2020

Little Holiday House Hop

 Hello everyone!! Welcome back to my blog!! Today, I'm participating in the Scrapbook.com's Handmade Little Holiday House Hop. 


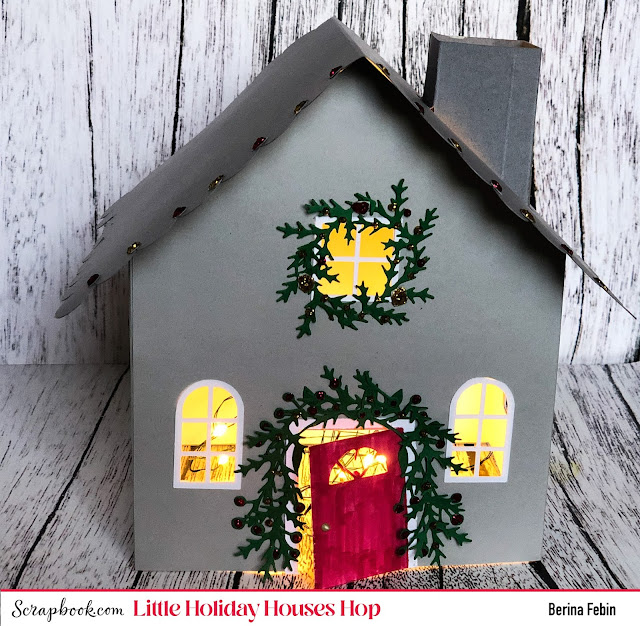
Scrapbook.com has the cut files for these beautiful houses, which you can decorate any way you want!!  I cut them using my Cricut Explore and assembled the pieces. I colored the door red with my copic marker. I used die cuts using Sizzix Mini Holiday Greens die set to create that garland and wreath. I added stickles in cranberry and golden rod to the wreath, garland and as lights on top of the roof.


I decided to add a twist and show you that you can use this to store treats :) I made a base for this using white 110 lb card stock. I measured the size of the house and added 2" to the length and width. Then I scored at 1" from the 4 edges and slit the corner and adhered them to create the base.


Here's a pic with it closed:


Now, I added some lights to the house:


This is perfect for a Christmas display on the mantle, with some pine trees!


How do you like my house today? Please do let me know in the comments!! This is part of the Little Holiday Houses Hop. Please visit my Instagram post here for the details.

Thank you for stopping by! Have a great day.


Thursday, November 19, 2020

Handmade Holiday PaperCrafting Parade

Hello everyone!! Welcome to the Scrapbook.com Handmade Holiday Papercrafting Parade! Christmas is my favorite time of the year and I love making Christmas cards! So I had to jump in when I saw this hop :)


I have 3 projects for you today - let's take a look at them one by one.


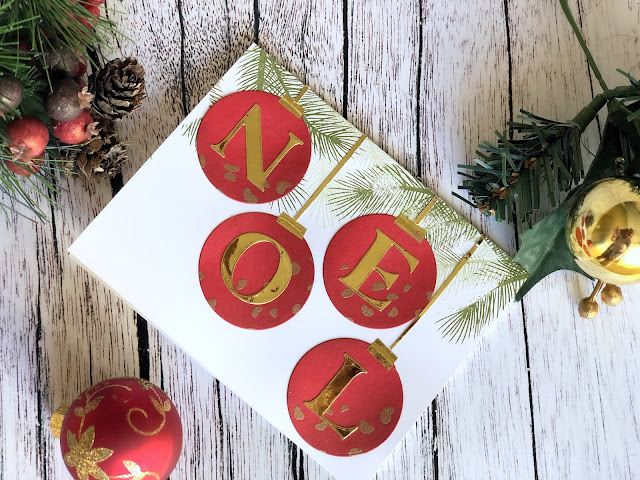
My first card uses the Confetti stencil from Scrapbook.com and their Alphabet dies. I die cut circles using the WRMK Circle dies, from a red card stock and inked the edges with Hero Arts - Red Royal ink. This just adds a little dimension. Then I used the Confetti stencil to add some embossing ink to one part of the circle and embossed it with Hero Arts - Gold embossing powder. Now I foiled a piece of Adhesive Toner Sheet with Gold foil and die cut the letters NOEL on it. I adhered the letter on the circle. I took a card base and stamped the pine leaves from the Sunny Studio - Christmas Trimmings using Hero Arts Forever Green ink on the top. Then I arranged these ornaments and adhered them down. Then I adhered a bit of double sided tape on top of the ornaments and added gold foil on top. For the string , I used left overs of foiled toner sheet from cutting the letters, and cut it in to thin strips using my paper trimmer.


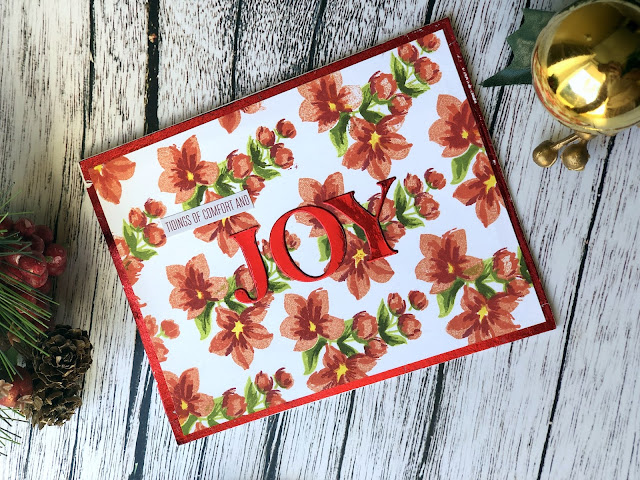
The second one is another Christmas card, for which I used a non-Christmas flower stamp. This layered Blossoms stamp set is a beautiful set which creates lovely layered flowers. I used Hero Arts inks to stamp the layers of the flowers on this cardstock panel. I used the Alphabet dies to die cut the letters JOY from Adhesive Toner Sheet and foiled it with Red foil. I added foil around the edge of the card base and adhered the panel with the tape runner. I adhered the foiled letters on it and added this sticker that said "Tidings of Comfort and Joy" from this Sticker book, after cutting off the 'Joy' from it.


The last one for today is a gift card holder. I had posted pics of this die on my Instagram stories and asked what I should be making with this snowflake die. One of the responses was to make a gift card holder, so here it is :) I die cut the snowflake on Adhesive Toner Sheet and foiled it with silver sketch foil. I made a gift card holder using Neenah cardstock panel. Using a double sided adhesive sheet, I foiled the entire front of the card with aqua foil and adhered the snowflake on top. I like how the snowflake extends beyond the front of the gift card holder.

How do you like my creations today? If you like them, please do check out the Handmade Holiday Papercrafting Parade on Instagram. You can go to my Instagram here. Thank you for stopping by! Have a great day and stay safe!!