Showing posts with label ODBD. Show all posts

Friday, December 18, 2020

Christmas Treat Basket

Hello everyone!! I'm on the Craftwell blog today, with a cute little treat basket, just in time for Christmas treats.


I used the Divinity Designs Bountiful Basket die to die cut the basket out of kraft card stock. It was pretty easy to do. It fit on my snap machine and was a breeze to cut. I needed 2 pieces of each die cut, and it was pretty easy to assemble. I stamped and die cut the Heartfelt Creations Poinsettia and shaped it with embossing tools. I die cut the greens using the Sizzix Mini Holiday Greens die set. I adhered the poinsettia and the greens on the basket and added some Nuvo drops for some berries.

Now, I added some Nuvo drops bottles and Stickles bottles to show you the size of the basket. Now, this is a basket I would love to receive ;)


One more pic, before you leave :)


How did you like this basket today? Please do let me know in the comments below. Thank you for stopping by. Have a great Festive Season and a wonderful New Year!


Saturday, April 25, 2020

Christmas Poinsettia

Hello everyone!! Here's a Christmas card that I made a few months back using a beautiful Digital image from Power Poppy.


I printed the Poinsettia and Pomegranates Digital Stamp from Power Poppy with a light border, so that I can do no-line coloring. With the traditional Christmas colors in mind, I colored the image with copic markers. I colored the background too. I gold embossed the sentiment from the Christmas Mini Set from Divinity Designs and matted the panel with a red card stock. I love coloring Power Poppy images and this one was no exception. I colored this image while I was waiting in my doctor's office for the 3 hour Glucose test when I was pregnant - coloring really helped me take my mind off things! 

Please do let me know your thoughts. Thank you for stopping by. Have a great day!

Tuesday, December 17, 2019

Christmas Window

Hello everyone!! I'm on the Craftwell blog today, with this Christmas card.


I started by cutting the window using the Spelbinders die from an A2 card base and a piece of Brown Butter card stock. I stamped the brown butter card stock with the Barn Wall stamp with Brutus Monroe Macchiato ink. I inked the die cut piece of window with the same ink too. I adhered acetate on the window and using a knife, cut out the panels on the acetate so that the window can still open and close. I sandwiched this acetate piece with the window, between the A2 card base and the brown butter panel. I die cut the candles on the window using the die from Divinity Designs. I heat embossed the sentiment from the Divinity Designs - stamp set with Gilded Embossing powder. I die cut the Christmas Tree (which is on the inside of the card) using the Spellbinders die on Brutus Monroe Glitterstock.


I'm loving using these dies on my Cut N Boss - it's really quick and easy. How do you like this card today? Please do let me know in the comments. Thank you for stopping by. Have a great day!!

Tuesday, October 29, 2019

Happy Birthday

Hello everyone!! As you might know already, I'm guest designing for Doodled Paper Playground and today I'm using one of the lovely sparkle blends from them.


I stamped the Stargazer lily from Divinity Stamps and colored with Copics. I fussy cut the image and colored the edges with a black marker. I took a piece of Raven card stock and die cut the oval window on it. I also heat embossed the sentiment from Brutus Monroe stamp set with Sterling embossing powder. I traced the oval window with a pencil on to an A2 card base and adhered foam tape around it. I added some of the Penguin Party sparkle mix in to in and closed it with acetate. I then adhered the black card stock with the oval window on top of it and adhered the lily image towards the left side of the window. I adhered a few pink sequins on the card for some finishing touch.

How do you like this card today? Please do let me know in the comments below. Thank you for stopping by. Have a great day!!

Monday, July 15, 2019

Peace On Earth

Hello everyone!! I'm on the Craftwell blog today with a Christmas card.


Ever since I bought this nativity border die from Taylored Expressions, I've been wanting to make a Christmas card with it. I die cut it out of Brutus Monroe Raven card stock with my Cut n Boss. I love the silhouette look. Then I took an A2 card base and blended the ink colors - Midnight, Plum, Cabana, Lapis and Sea from Brutus Monroe, in that order from top down. I blended a little bit of Phonebook ink, for the halo. I adhered the die cut at the bottom of the card base. I die cut just the star part with Brutus Monroe Sterling glitterstock and adhered it on top of the black star. For the sentiment, I found the perfect one in the Divinity Designs - Christmas Mini set. I heat embossed the Peace On Earth sentiment with Brutus Monroe Sterling Embossing powder.

How do you like this card? Please do let me know in the comments below. Thank you for stopping by today! Have a great day!!

Tuesday, February 27, 2018

Merry Christmas

Hello everyone! Today I'm sharing another card that I made for the Winnie & Walter 4th birthday bash challenges.


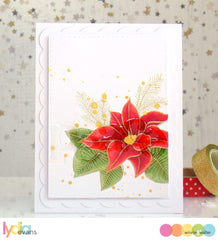
I stamped the poinsettia from the In Bloom: Elsa's Flora stamp set. with DI Antique Linen on watercolor card stock. I then masked it and stamped the pineleaves with DI Forest Moss and DI Peeled Paint and I used second generation stamping as well. I started watercoloring the poinsettia with DI Barn Door. I didn't have any other shades of red DI, so I used my cheap markers to add some shading and blended it out with a wet brush. Finally I used a red sharpie marker to add the veins. For the center, I watercolored with DI Scattered Straw and added some accent with a gold glitter gel pen. I used a wet brush to kind of blend the pine leaves to give them a watercolored look. I stamped the sentiment from Our Daily Bread Designs Christmas Mini Set. I adhered the water colored panel on to an A2 card base. 


This cars was inspired by Lydia's card:

In Bloom: Elsa's Flora

Thanks for stopping by today. Have a great day.

Submitting this to:

Tuesday, January 30, 2018

Just Cards! Winter 2018

Hello everyone! I'm so excited to have 3 of my cards published in Just Cards! Winter 2018 issue. One of the cards made it to a teeny tiny corner on the cover too!


This is the cover of the magazine. The card in the Holiday section (lower right) is one of my cards.


Card using Verve Stamps, DCWV papers and Inspired By Stamping ribbon.


 Card using Our Daily Bread Designs and Verve stamps.


Card using Power Poppy digi and Unity Stamps. 

Now, some info on getting published in this magazine. Here's some important links:
You just mail them the cards and the details. If your cards are selected, you will get a free copy of the magazine. There's no other way of knowing if your card was selected. Also, if it wasn't selected for the issue/edition you sent it to, there's a high chance it might be in one of the future ones too. I had submitted these cards to the Summer and Christmas issues of last year, but some of them got published in the Fall issue and some in the Winter issue. So there's always a chance! Let me know if you need more info.
Thanks for stopping by. Hope you have a great day!

Monday, January 15, 2018

I'm Published! - Our Idea Book

Hello everyone! I'm published! Yay! This time in 6 of my cards were published in the Issue 3 of Our Idea Book. Aaand one of my cards made it to the front cover! 


That's my card on the top right :)


One of cards appeared on the contents page too!


First card was made with Our Daily Bread Designs Jingle Bells stamp and Your Next Stamps die and the second was made with Unity Stamps From Our Heart To Yours.


First card on this page was made with Our Daily Bread Designs Cardinal stamp and Your Next Stamps die. The second one, the one on the cover was made with Stampendous Christmas Cottage stamp and Power Poppy Glistening Paperwhites.


First card in this page was made with Unity Stamps From Our Heart To Yours. Second card was made with Inspired By Stamping Snowflake Wonder.

That's 6 cards! Unfortunately, Our Idea Book has taken a break for now and I'm hope they'll be back soon!

Thanks for stopping by. Have a great day!

Saturday, October 28, 2017

I'm Published!!

Hello everyone!! I'm published! Yay! 5 of my cards are published in the Just Cards! Fall issue. Here are the pages where my cards are present.


This is the cover of the magazine (I'm not on the magazine cover).


My fish bowl shaker card using Hero Arts Color Layering Fishes and Kennedy Grace sequins.


This one using Power Poppy Gladioli digital image and sentiment.


Card using ODBD Stargazer Lily and Crocheted Background. Sentiment from Winnie & Walter.


Card using Unity Stamps.


Card using ODBD Jingle Bells and Verve Stamps sentiment.

Now, some info on getting published in this magazine. Here's some imporatnt links:
You just mail them the cards and the details. If your cards are selected, you will get a free copy of the magazine. There's no other way of knowing if your card was selected. Also, if it wasn't selected for the issue/edition you sent it to, there's a high chance it might be in one of the future ones too. I had submitted these cards to the Summer and Christmas issues, but some of them got published in the Fall issue. So there's always a chance! Let me know if you need more info.

Thanks for stopping by. Hope you have a great day!

Wednesday, September 6, 2017

Birthday Wishes Anemones

Hello everyone!! I'm here to share a card that I made today.


I stamped the WPlus9 Modern Anemones on a piece of white cardstock, colored them with Copics - RV14, RV13 and RV21 for the flowers, E57 for the flower centers and G99, YG67, YG63 and YG03 for the leaves and fussy cut them. I stamped and embossed the Our Daily Bead Designs - Crocheted Background on vellum with Wow! White Pearl embossing powder. I cut a piece of pink card stock to size 5" x 3.75" and adhered the vellum on it. I arranged the flowers and leaves on it and adhered it using double sided adhesive tape and foam tape of varying heights to add more dimension to the flowers. I embossed the sentiment 'birthday wishes' from Inspired By Stmping - Summer Bouquet stamp set with Wow! Ebony embossing powder on vellum and cut it into a fishtail banner and adhered it above the flowers. I adhered the entire panel on white top folding A2 card base and added a few pearls colored with RV14.


I love the subtle look of the embossed Crocheted Background on the pink background.

I made this card just in time for the Taylored Expressions 9th Birthday Sketch Challenge. Here's the sketch:


Thank you for stopping by. I appreciate your comments. Enjoy your day. 

Submitting this to:

Thursday, March 30, 2017

Cardinal Ornament

Hello everyone! I'm here to share a Christmas card with a cardinal. 


The Cardinal is a stamp from Our Daily Bread Designs. I stamped it with Hero Arts black ink and colored it with my markers and cut it out in the shape of an ornament. I added drops of Nuvo Drops pale Gold to give it a shaken snow globe effect. I added a few pine branches, cut out using the Martha Stewart punch and a few pearls as berries. The sentiment is from Unity Stamps' Unto Us stamp set and I embossed it with Hero Arts gold embossing powder.

I hope you liked this easy and simple Christmas card. Do let me know what you think. Thank you so much for stopping by today. Your comments are much appreciated.

Submitting this to:

Thursday, March 9, 2017

Cardinal Snow Globe

Hello everyone!! It's been sometime since I posted here. Here's a Christmas card that I had made earlier, but couldn't share it before.


I stamped the Cardinal from the Our Daily Bread Designs and colored it with markers. I used an SVG from Bird's Cards to cut out the snow globe part on my Cricut Explore. I colored the base of the snow globe with Copics. I filled the shaker with gold and silver stars, from a shaker mix that I bought from Dollar Tree. On the card base, I added 1/8" ScorTape around the edges and added gold foil, to create a border. The sentiment is from Verve Stamps, which I embossed with gold powder.

Hope  you like this shaker card. Thanks for stopping by. Hope you have a great day.

Submitting this to:

Saturday, October 29, 2016

Thinking Of You - Jumping Butterflies

Hello everyone!! I'm here to share a card that I made recently.

Here's what I made:


I recently won a giveaway from Joanna Munster of Inspired By Stamping. It included the stamp set Fresh Bouquet. It has a beautiful image of a floral bouquet. I decided to ink it up and color it with my copic markers. Then I fussy cut it. The sentiment is also from the same set.


I stamped a few butterflies and lady birds from the Our Daily Bread stamps' Butterfly and  Bugs. I colored them with copics and fussy cut them. I wanted to make them animated i.e. I wanted them to have some kind of movement. So I took a strip of acetate, folded one end and glued the butterfly on to it. The other end just went behind the bouquet. To explain, I took a few pictures showing the process.

Take a strip of acetate. I took mine from an old packaging.


Fold it near one end, to look like a tick mark.


Using a bone folder, crease the fold.


Apply adhesive to the smaller portion of the tick mark and adhere the die-cut/image. I used double sided tape.


The other end of the tick mark, i.e. the longer part goes under the image or it can be just adhered to the card base.


It kind of gives a spring action. I took a quick video to show it in action.


The color scheme of this card was inspired by the Inspired By Stamping color theme for the design team search.


So how do you like the card? Have you tried this method already? Or will you be trying after seeing this? Please do let me know in the comments.

Thanks for stopping by. Enjoy your day.

Submitting this to:

Wednesday, November 25, 2015

Cattails

Hello everyone!! It's time for a new challenge here at Word Art Wednesday. Tomorrow is Thanksgiving day here in the US. This week's verse fits perfectly for singing thanks to the Lord, who has been good to us always!!


I printed the word art on white paper and inked it with DI Scattered straw and Dried Marigold. Then I stamped Our Daily Bread Designs - Cattails stamp and the butterfly from Our Daily Bread Designs - Butterfly and Bugs stamp set using brown markers. The frame is cut with my Cricut using a cut file from Inspired by Stamping. It is a stitched rounded rectangle frame. I was inspired by Tracey's card at the MUSE challenge.

Thanks for stopping by. Please visit the Word Art Wednesday blog for more inspiration and for more insight into today's verse. It's not to be missed!!

Submitting this to: