Showing posts with label Shaker card. Show all posts

Thursday, December 7, 2023

Shaker Lantern

 Hello everyone! Welcome back to my blog. Today I have a shaker lantern shaped tag for Christmas.


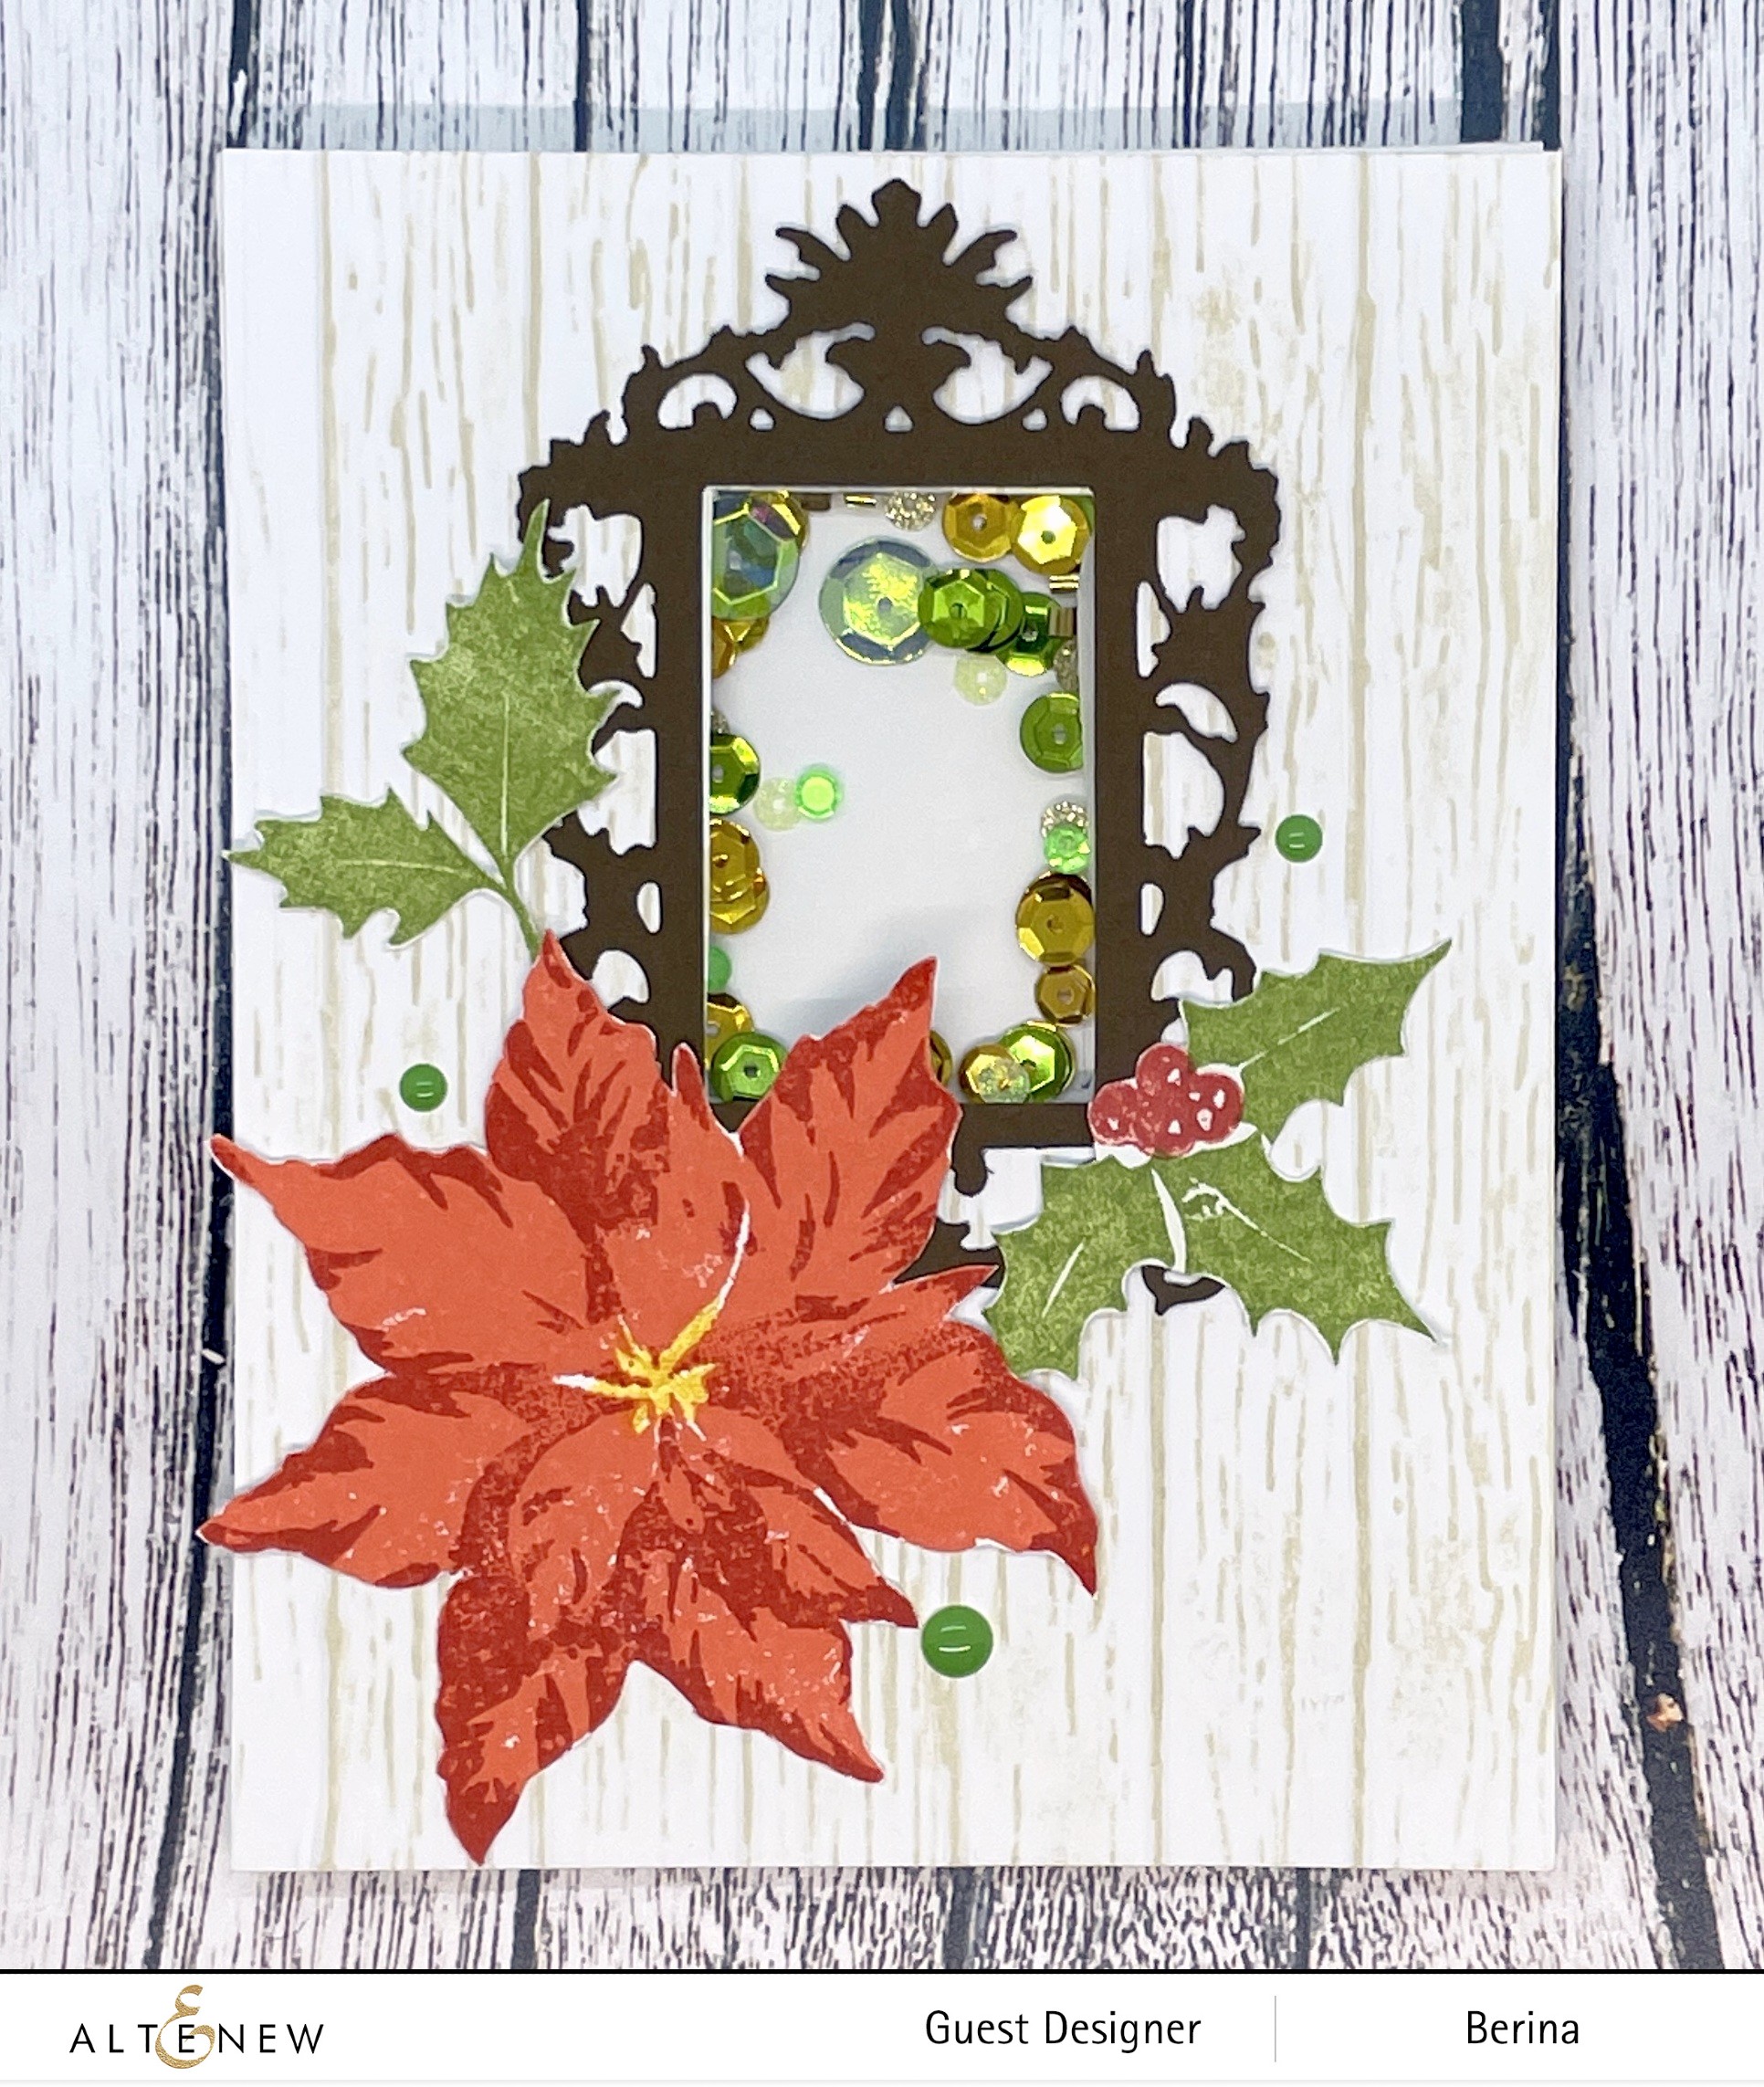
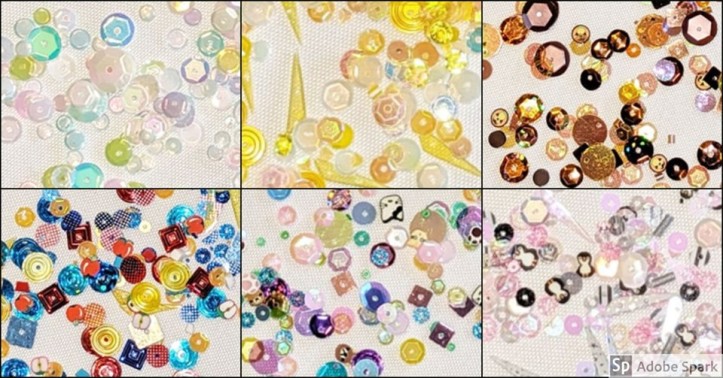
I used the Lantern die from Honey Bee Stamps to die cut the frame and cut out a white backing cardstock based on that. The branches, poinsettias, pine cones, mistletoe and bird are from the Honey Bee Stamps- Lovely Layers: Seasonal Frame. I used some shaker mixes from Doodles Paper Playground to create a shining and shimmery mix for the shaker. I didn’t want to add a sentiment, as that would kinda block the view, lol! I can write it on the back. I love how it turned out. 

What do you think? Please do let me know in the comments. Thanks for stopping by! Have a great day!

Friday, November 3, 2023

Chickadee Snow Globe

 Hello everyone! Welcome back to my blog. Today I have a Christmas card with shaker snow globe on an easel - oh and there's a chickadee inside the snow globe :)


I recently bought a die set from Momenta that has snow globe dies and a few transparent shaker domes as well. I wanted to use it for this card. I inked the background with Hero Arts Tide Pool ink. I die cut the chickadee using the dies from Honey Bee Stamps - Lovely Layers - Winter birds. The leaves inside the shaker are from the Honey Bee Stamps - Lovely Layers - Peony. I used a mix of different sequin mixes for the shaker. For the berries, I colored white pearls with Copics. The pine boughs are from Elizabeth Craft Design - White Pine Pinecone and Boughs. For the background, I used Altenew - Deck Planks 3D embossing folder.


Here's the easel look. For the stopper on the easel, I used the sentiment die from Crafters Companion - We wish you a merry Christmas. I die cut multiple layers of the sentiment and adhered them together to get the thickness. 


Here's a closer look at the sentiment die cut. The shaker dome adds a nice effect to the shaker snow globe. I spent more time on deciding what to use as a stopper for the easel than making the whole card, lol!

How do you like this card today? Please do let me know. Thanks for stopping by. Have a great day!

Saturday, October 7, 2023

Snowflake Ornament

 Hello everyone! I have finally started working on my Christmas cards! Here's a shaker card with a blue snowflake ornament.


For this card, I used the Hero Arts - Snowflake Ornament. I die cut it in blue card stock. I used shaker mix from Doodle Paper Playground. The sentiment is from Divinity Designs. I stamped the sentiment in blue color to match the ornament. 

How do you like this card today? Please do let me know! Thanks for stopping by. Have a great day!

Sunday, September 10, 2023

Betta Birthday

Hello everyone! I'm sharing a fishy birthday card today. 


I'm trying to use my craft supplies that have been neglected for so long. This stamp set is one of them, Hero Arts - Color Layering Betta Fish. I used Hero Arts - Ultra Pink and Brutus Monroe - Rouge inks to create this fish. I skipped the black outline layer since I wanted to give it a no-line look and fussy cut the image out. I created the frame by die cutting a oval, added some foam tape and used some sequin mix from Doodles Paper Playground - it even has a tiny shark in the mix, to keep the betta company. I attached the betta to a string and adhered the string down along the frame - this allows the betta to have some movement when shaking the card. The sentiment is from Altenew - Freesia stamp set. 

How do you like this card? Please do let me know in the comments. Thanks for stopping by. Have a great day!

Monday, January 2, 2023

Butterfly Thanks

 Hello everyone! Wish you all a very Happy New Year! I'm on the Craftwell blog today with a beautiful pastel colored shaker card.


Check my post here to see how I made it. How do you like this card today? Please do let me know in the comments. Thanks for stopping by. Have a great day!

Thursday, September 29, 2022

Altenew Sticky Essentials Blog Hop + Giveaway ($300 in Total Prizes!)

 Hello everyone! Welcome back to my blog. Today, I'm so excited to be part of the Altenew Sticky Essentials Blog Hop today. 


Today I have a shaker card to share with you to showcase the Altenew adhesives


I used the Altenew - Poinsettia & Berries stamp for the images. The background is my all-time favorite Deck Planks 3D Embossing Folder. The frame is from the New Day Card Kit Frame Die set. For the shaker part, I used the Altenew - Instant Dimension Foam Tape. I used the Altenew - Ultra Sticky Double Sided Tape to adhere most of the parts and the Precision glue for the frame.

Giveaway Prizes

$300 in total prizes! To celebrate this special blog hop, Altenew is giving away a $50 gift certificate to 2 lucky winners and a $25 gift certificate to 8 winners! Please leave a comment on the Altenew Card Blog and/or each designer’s blog post on the blog hop list below by 10/05/2022 for a chance to win. Altenew will draw 10 random winners from the comments left on each stop of this blog hop and announce the winners on the Altenew Winners Page on 10/06/2022.

Blog Hop

You must have come from Michelle's blog. The next on the hop is Teri. In case you got lost, here's the full lineup:

Altenew Card Blog

Virginia Lu

Helen Kalb

Lilith Eeckels

Teresa Litchfield

Laurie Willison

Bridget Casey

Michelle Burnier 

Tenia Nelson

Linda Westfall

Seeka

Therese Calvird

Karen Brown

Sadia Ashraf

LauraJane

Erin Thompson

Terri Koszler

Hannelie Bester

Amy Hill

Nathalie DeSousa

Marieke Slaats

Disha Jain

Maryam Pérez

Michelle Short

Berina Rajakumar

Teri Wilson

Reiko Tsuchida ***Note: Due to strict regulations in Japan, you might not be able to leave a comment on her blog post.


Thank you for stopping by. Have a great day!


Friday, April 16, 2021

Beautiful Day Daisies

Hello everyone! Welcome back to my blog. I have a shaker card to share with you today.

I stamped the individual daisies and leaves from the Altenew Happy Blooms stamp set and colored them with Copics. I fussy cut them all out. I die cut a oval frame and made a shaker element with sequin mix from Doodles Paper Playground. I adhered the flowers and leaves around the oval. The sentiment is from the Statement Flower stamp set. I used the colors from the current Altenew Inspiration Challenge.

How do you like this card? Please do let me know in the comments. Thank you for stopping by. Have a great day.

Submitting this to:


Tuesday, November 19, 2019

Shaker Ornament

Hello everyone!! Today is  blog hop day at Brutus Monroe and our theme for today is Ornaments. Here's what I made for today:


I die cut the plaid pattern paper from the Winter Cabin paper pad with the star die. I also die cut the star from using the same star die set on Gilded glitter stock. I die cut the same frame on a sheet of fun foam. I didn't have any black/red foam sheets, so used a pink one and I colored the edges with a black marker. For the shaker mix, I applied some Gold glitter glaze over the Stars stencil on my craft mat and let it dry. Once dry, I carefully removed them. I added these glitter stars and some sequins from one of the older inspiration box.

How do you like this ornament? Please do let me know in the comments. Here's the line up for today:

Berina
Jessica
Lauren
Cassie

Thanks for stopping by. Have a great day!!


Monday, November 18, 2019

Snowflake Ornament

Hello everyone!! I'm on the Craftwell blog today, with this Christmas card with shaker ornament. 


I die cut the Rinea Gold foil with the Hero Arts Snowflakes and Ornament Fancy die. I embossed a piece of Brutus Monroe - Brown Butter cardstock with Woodgrain Cottage and die cut the ornament window on my Cut 'N Boss. I created the shaker window by using foam tape and acetate. I used Doodles Paper Playground - Ruby Sparkle blend for the shaker mix. I adhered the gold foil ornament on the acetate window. I also die cut the letters 'joy' using the die from Whimsy stamps, on gold foil and adhered it in the center. 

How do you like this card? Please do let me know in the comments. Thanks for stopping by today. Have a great day!!

Tuesday, October 29, 2019

Happy Birthday

Hello everyone!! As you might know already, I'm guest designing for Doodled Paper Playground and today I'm using one of the lovely sparkle blends from them.


I stamped the Stargazer lily from Divinity Stamps and colored with Copics. I fussy cut the image and colored the edges with a black marker. I took a piece of Raven card stock and die cut the oval window on it. I also heat embossed the sentiment from Brutus Monroe stamp set with Sterling embossing powder. I traced the oval window with a pencil on to an A2 card base and adhered foam tape around it. I added some of the Penguin Party sparkle mix in to in and closed it with acetate. I then adhered the black card stock with the oval window on top of it and adhered the lily image towards the left side of the window. I adhered a few pink sequins on the card for some finishing touch.

How do you like this card today? Please do let me know in the comments below. Thank you for stopping by. Have a great day!!

Friday, October 25, 2019

Shaker Bookmark for Teacher

Hello everyone!! As you might already know, I'm guest designing for Doodles Paper Playground this month. Here's another post using one of the sparkle blends from this month:


A shaker bookmark for a teacher!! I cut plastic sleeves in to the size I wanted (roughly 1.4" x 6"). I laminated these pieces in the laminating pouch. I used 5" x 7" laminating pouches and it fit 3 bookmarks. Make sure to leave enough space between the plastic sleeve pieces so that when we cut them apart, the lamination still stays strong. After laminating, cut the individual pieces apart. Now you have a clear pouch that is closed on 3 sides. You can fill whatever you want, in it. I cut a piece of the Jeepers Creepers toner sheet from Brutus Monroe and foiled it with Red Static foil. I inserted the foiled transparent sheet in to the laminated pouch and added some of the Apple For Teacher sparkle blend. Then I sealed the 4th side with double sided adhesive tape. I trimmed the excess clear plastic. I used a double sided scotch tape to cover the 4th side and folded the scotch tape on to itself. Then I adhered Red Static foil on to it. Then I poked a hole and added a red and white baker's twine.

How do you like this shaker bookmark? Please do let me know in the comments below. Thank you for stopping by. Have a great day!!

Thursday, October 17, 2019

Happy Birthday

Hello everyone!! As you all know, this month, I'm guest designing for Doodles Paper Playground and today is the October Release Blog Hop!!

Hello Sparkle Blends Fans! Get ready, because it’s time to celebrate! That’s right, its time for our October Release Blog Hop!

There are 6 brand new blends for you this month, and the design team has been hard at work creating inspiration projects to share with you! We went a bit more subtle for the Autumn and holiday season, we have the 2 more Blends for our Birthstone Collection, plus we’ve got some bold Blends for just for our pets, as well as the teacher and students in our lives. Check out Opal, and Citrine (October and November Birthstones), Apple for Teacher, Penguin Party, Pawsome Pets, and Pumpkin Spice.

October Release

Our latest Sparkle Blends are live for purchase, right now, at White Rose Crafts & you can find detailed descriptions and direct links in our October Release Blog Post!

The Designing Divas have once again created some amazing projects this month, so make sure you leave them some comment love for a chance to win one of the prizes listed below! Do you have a favorite blend from this release? Make sure you circle back to the Doodles Paper Playground Blog and leave a comment with your favorite blend for a chance to win a pack!


I used the Eternal Elegance Cut and Emboss folder from Crafter's Companion on a piece of yellow card stock. Isn't that design so elegant? Then I took an A2 card base and used a pencil to lightly trace the windows. I adhered foam tape around the windows and added the sparkle blend November Citrine. Then I adhered acetate over the windows and then the embossed card stock. I stamped the sentiment Happy Birthday from Sharon's Script stamp set by Brutus Monroe. I cut it into a banner and adhered it on to the card.

Here's the blog hop line up:

Alison Heikkila with guests, Rhiannon & Phoenix
EK Gorman <— you are here
GIVEAWAY DETAILS: 

Open Internationally. You must leave comments on each leg of the Blog Hop by 10/20/19 to be eligible to win one of the following prizes. Winners will be notified in a post here on the blog, no later than 10/25/19. 

We are giving away SIX Prize Packs this month, each one featuring one of our new blends, at least one coordinating stamp set, either coordinating dies or a second stamp set, at least 2 ink cubes & 6 sheets of coordinating 6x6 patterned paper! For our GRAND PRIZE, one of these 6 winners will be randomly selected to receive Mini Packs of the Full October 2019 Release in their prize pack! 

Each of these packs has an approximate value of at least $15.00! (Grand Prize Value is approximately $24.00!)

Rules: You must be at least 18 years old to enter. Open internationally. To Enter, leave comments on each leg of the blog hop no later than 11:59pm EST on Sunday, October 20th, 2019 to be eligible to win one of our 6 prize packs. Winners will be notified within a blog post on the Doodles Paper Playground Blog no later than 11:59pm EST on Friday, October 25th, 2019. Winners will have 5 days to email DoodlesPaperPlayground@gmail.com with their address info to claim their prizes. Any unclaimed prizes will be redrawn and shipped to a runner up.


How do you like my card today? Please let me know in the comments below. Thank you for stopping by. Have a great day!!

Monday, October 14, 2019

Congratulations! Baby Boy!!

Hello everyone!! I'm on Craftwell blog with this shaker card for a baby shower for a baby boy. 


I cut a piece of 8 1/2" x 11" card stock to 8 1/2" x 7 1/2" I took the remaining 3 1/2" x 8 1/2" and die cut 3 stars out of it. I used the star dies from Brutus Monroe on my Cut N Boss. I die cut various star frames and some small solid stars from a light blue card stock as well. For the shakers, I used Doodle Paper Playground Precious Boy shaker mix. The sentiment is cut from the Charcoal glitterstock with Brutus Monroe Congratulations die. I lined the card base with a grey card stock and adhered the shaker panel on to it. I adhered the sentiment on to it.

How do you like my shaker card today? Please do let me know in the comments. Thanks for stopping by, have a great day.

Sunday, October 13, 2019

Hello Fall Shaker

Hello everyone!! I have some exciting news!! I'm guest designing for Doodles Paper Playground! YES! I get to play with their beautiful shaker mixes :) For today, I have this Fall themed shaker card for you:


I dry embossed a piece of white card stock with Darice Tree Trunks embossing folder and colored the embossed image with Copics. I really liked doing it - it has a beautiful no-line coloring look as well as some added dimension to the image. Then I cut out a frame with the Brutus Monroe Brown Butter card stock adhered a sheet of acetate on the inside. I adhered the embossed panel on to an A2 card base and adhered foam tape all around the edges. I added the shaker mix Pumpkin Spice and adhered the window on to the foam tape. 


How do like this shaker card? Please do let me know in the comments below. Thanks for stopping by. Have a great day!!


Tuesday, September 17, 2019

Foiled Christmas Ornaments

Hello everyone!! Today's blog hop day at Brutus Monroe and our theme for today is Decorative Details.


I decided to make a shaker card with Brutus Monroe sequin mix. I used one of the newest toner sheet and foil transfer sheet for the shaker window. I used the Ornamental Designer Toner sheet with the Red Static foil. The sequins are from the Steampunk Inspiration Box. I used a shaker pouch to make this quick shaker card. I heat embossed the sentiment from Yuletide Greetings with Gilded embossing powder.

What do you think of this shaker foiled card? Please do let me know. Here's the hop order for today:

Vicki

Supplies:

Affiliate links are used
Yuletide Greetings - 6x8 Stamp Set

BM
Embossing Ink
Embossing Ink

BM
Metallic Embossing Powder - Gilded

BM
Not Your Mama's Cardstock - Heavyweight

BM
Alabaster 110lb - Premium Cardstock

BM
Deco Foil™ Transfer Sheets

BM | TW

Brutus Monroe Foil Transfer Sheets 6" x 12" sheets - Red Static

BM
Brutus Monroe Designer Toner Sheets - Ornamental

BM
Glue
Glue

BM
Squeaky Clean Stamp Cleaner

BM
Squeaky Clean Stamp Scrubber

BM
Acrylic Block
Acrylic Block

BM
Embossing Heat Tool
Embossing Heat Tool

BM
Clear T Square
Clear T Square

BM
Fold and Score Tool
Fold and Score Tool

BM
Mini Ink Blending Tool Kit

BM
Mini Ink Blending Tool Replacement Foams - 20 Pieces

BM
3D White Foam Squares • 1/2 in

BM | TW
Thermoweb - Purple Tape

BM | TW
Sticky Tape Mini Runner™

BM | TW
Brutus Monroe - Foam Tape - 36 Yards - 108 Feet

BM
Fussy Cutting Scissors

BM
Self Adhesive Shaker Pouch - 25 Pack

BM
Steampunk Sequins
Steampunk Sequins

BM

Wednesday, August 21, 2019

Pop-up Butterflies

Hello everyone!! I'm on the Brutus Monroe blog today with this pop-up Butterflies card:


Here's the inside pop-up:


I started by stamping a few butterflies from the Take Flight stamp set and flowers and leaves from the Inked Flowers stamp set with Raven ink. Icolored them with Copics and fussy cut them all. For the front of the card, I made a shaker. I die cut a oval window in a piece of card stock and adhered acetate to the back of it. I took an A2 card base and colored the edges with the same pink marker. I added some sequins and adhered the window panel with foam tape. I adhered the flowers, leaves and 1 butterfly on to it. On the inside, I attached the butterflies to each other using thin strips of paper. Then I adhered half of the 1st and last butterfly to the card stock, so that it forms the pop-up.

How do you like  my card today? Please do let me know in the comments below. Thank you for stopping by. Have a great day.

Supplies:

Affiliate links are used
Sharon's Script
Sharon's Script

BM
Inked Flowers 6x8 Stamp

BM
Take Flight 3x4 Stamp

BM
Raven Detail Ink
Raven Detail Ink

BM
Not Your Mama's Cardstock - Heavyweight

BM
Alabaster 110lb - Premium Cardstock

BM
Glue
Glue

BM
Squeaky Clean Stamp Cleaner

BM
Squeaky Clean Stamp Scrubber

BM
Acrylic Block
Acrylic Block

BM
Embossing Heat Tool
Embossing Heat Tool

BM
Clear T Square
Clear T Square

BM
Fold and Score Tool
Fold and Score Tool

BM
Mini Ink Blending Tool Kit

BM
Mini Ink Blending Tool Replacement Foams - 20 Pieces

BM
3D White Foam Squares • 1/2 in

BM | TW
Thermoweb - Purple Tape

BM | TW
Sticky Tape Mini Runner™

BM | TW
Brutus Monroe - Foam Tape - 36 Yards - 108 Feet

BM
Fussy Cutting Scissors

BM