Showing posts with label Birthday. Show all posts

Friday, February 16, 2024

Birthday Flowers

 Hello everyone! Welcome back to my blog. Today I have a floral birthday card to share with you. 

I die cut the flowers and bees using Hero Arts - Bees and Flowers die set. I colored them with copic markers. I ink blended a card base with Hero Arts - Tide Pool ink ariund the center and adhered the flowers on it. I die cut the thread knot die from The Greetery - Fit to be tied die set. I die cut the arch frame using dies from Scrapbook.com and adhered it with foam tape. The sentiment is from Hero Arts - Tulips. 

I love how this card turned out. What do you think? Please do let me know. Thanks for stopping by. Have a great day. 

Submitting this to:

Saturday, January 20, 2024

Dandelion Wishes

 Hello everyone! Welcome back to my blog. Today I have a white on white birthday card with some sparkle and shine. 

I used the Altenew - Geo Diamonds 3D embossing folder for the background. I die cut the Spellbinders - Make a Wish die set on white and white glitter paper. I arranged them and adhered them on to the embossed background. The sentiment is from Creative Expressions, which I also die cut on white glitter paper and adhered it to the card. 

How do you like this sparkly card? Do let me know. Thanks for stopping by. Have a great day. 

Submitting this to:

Sunday, January 14, 2024

Lily of the Valley

 Hello everyone! Welcome back to my blog. Today I have an easel card with 3D flowers. 

I used the Spellbinders - Susan’s Garden - Lili of the Valley die set for making the flowers and foliage. It was pretty easy to make and I love making 3D flowers. I die cut the oval window with Tutti Designs dies. The heart flourish on the right is a dies from Heartfelt Creations. The sentiment die is from Creative Expressions - Belated Birthday Wishes, which I die cut multiple times and snipped off the belated. Here’s a pic when it’s closed. 

What do you think? Do let me know. Thanks for stopping by. Have a great day!

Submitting this to:

Saturday, January 13, 2024

Blue Clematis

 Hello everyone! Welcome back to my blog. Today I have a floral birthday card to share with you. 

I stamped the Altenew - PAF Clematis with Ink on 3 ink for no line coloring and colored it with copics. I cut the image out. The sentiment is from Altenew - Fresh Freesia stamp set. I used the colors from the current Altenew Inspiration Challenge. 

How do you like this card. Do let me know. Thanks for stopping by. Have a great day and weekend!

Submitting this to:


Wednesday, January 10, 2024

Foxy Birthday

Hello everyone! Welcome back to my blog. Today I have a woodland themed card which I made for my son’s birthday. 

I used the Hero Arts - Jungle Frame fancy die to die cut the frame. The fox is from Hero Arts - Winter Critters stamp set, which I stamped, colored with copies and fussy cut. The wooden bark is from Honey Bee Stamps - Lovely Layers- Wood Vase die set. I decided not to add a sentiment on the front of the card. 

How do you like this card today. Do let me know in the comments below. Thank you for stopping by. Have a great day. 

Submitting this to:


Tuesday, January 9, 2024

Winter Birthday

Hello everyone! Welcome back to my blog. Today I have a white on white winter birthday card. 


I recently bought some new dies from the Simon Says Stamp Diecember sale. The Birthday Wishes and Forest Greenery dies are new from that haul. The Simon Says Stamp 3D embossing folder is also new to me. For the Birthday Wishes die, I used vellum for one of the layers. 

How do you like this card? Please do let me know. Thanks for stopping by. Have a great day.

Submitting this to:


Sunday, October 15, 2023

Acanthus Birthday

 Hello everyone! Welcome back to my blog. Today I have 2 cards that I made with the same set of supplies and theme.


I used the Altenew - CYL Floral Acanthus set to make both of these cards. I've been wanting to try to die cut the pieces using the die set from the CYL set and emboss the die cut pieces with the 3D embossing folder from the set. The embossing folder does not coordinate with the die set or stamp set directly, but with a few hacks, I was able to do that. I started by die cutting the pieces on white cardstock. Then I put the individual pieces on the embossing folder, aligned it as needed, spritzed some water and embossed it. 

I had to trim off the excess from the embossed images, since the die cuts were a bit larger than the embossing. After trimming them to size, I used the stencil with a few different inks, namely Brutus Monroe - Jack O Lantern, Stargazer, Rouge, Memento - Morocco to blend in some colors to match the theme from the current Altenew Inspiration Challenge.


Now I have a bunch of pieces that I needed to assemble. All the pieces wouldn't fit on 1 card, so I decided to make 2. I also had a few extra die cuts that were not embossed. I colored them too, with inks. I wanted to use black, as I thought it would be nice to have these bright colors on a black background.


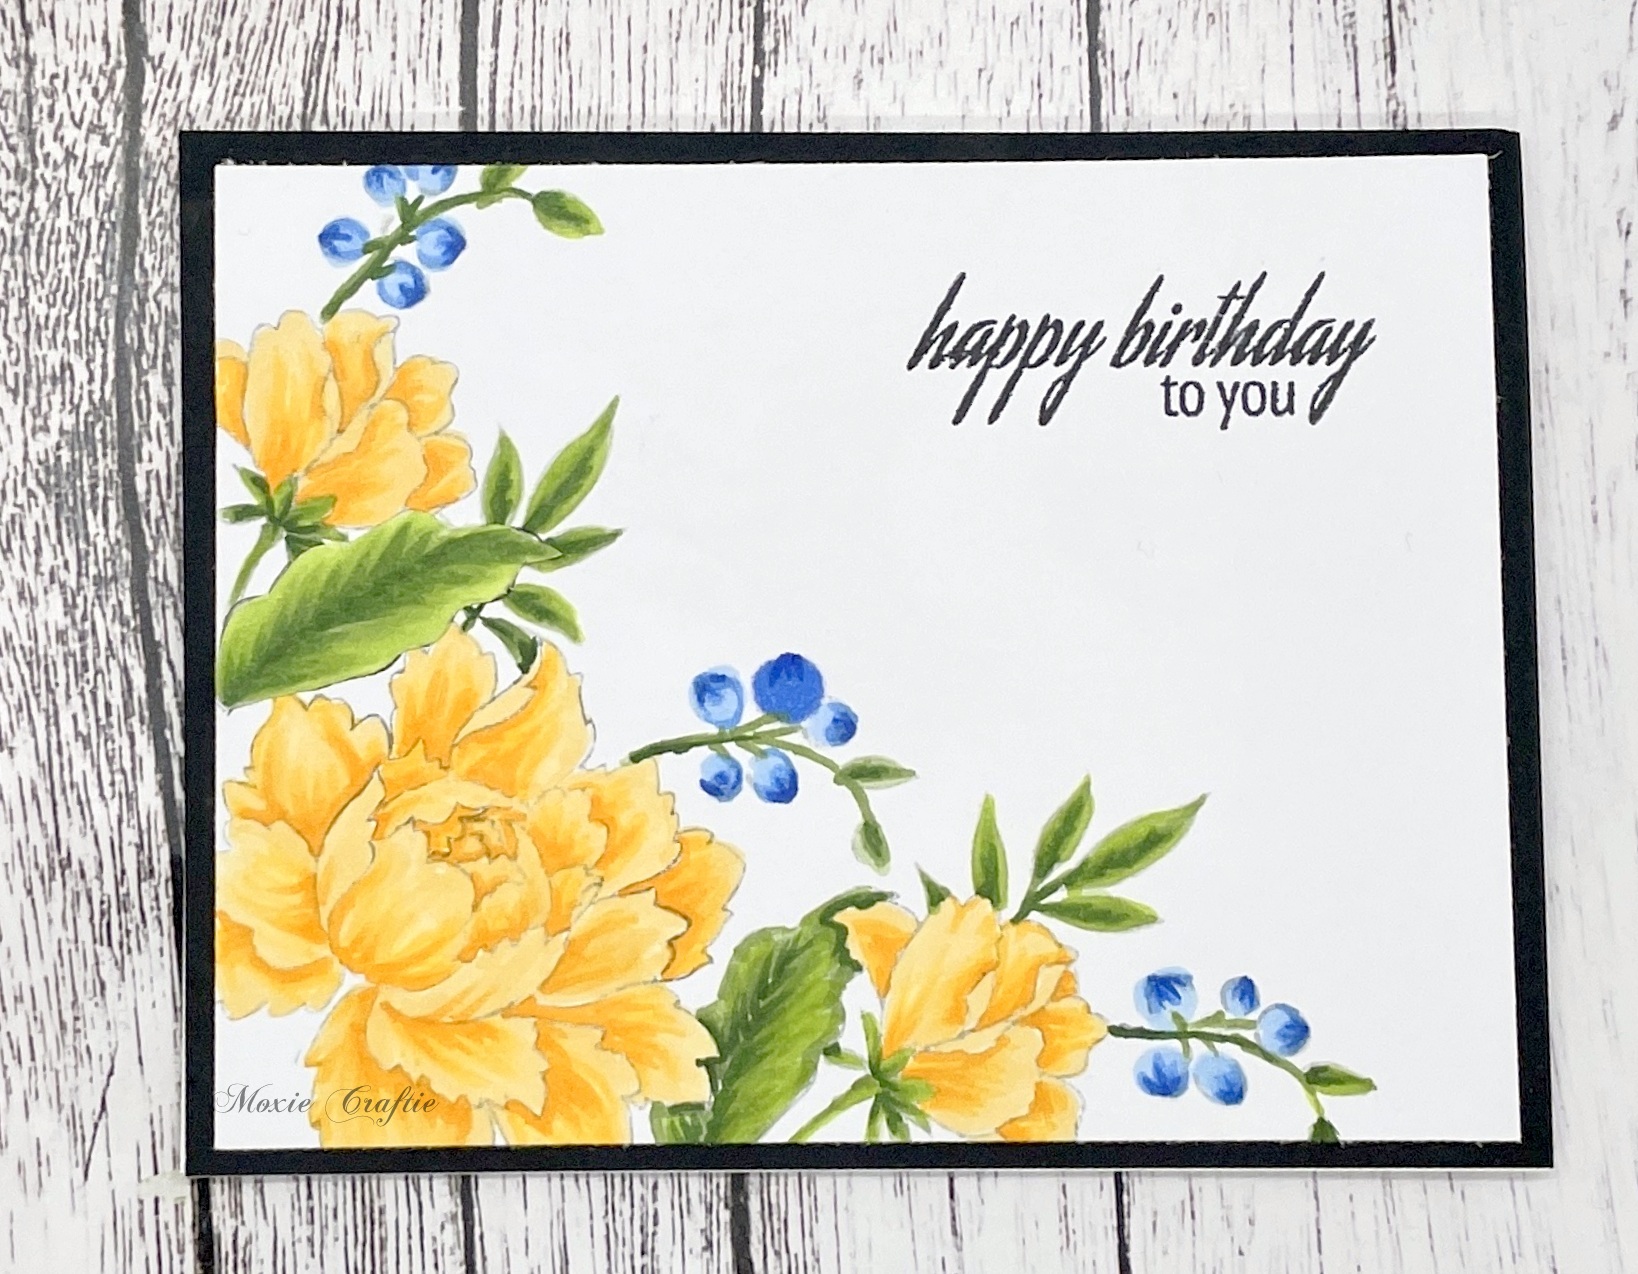
I just love these colors. For the sentiment, I used this stamp from Inspired By Stamping. 


So here are both cards, using the same set of supplies and color themes. How do you like it? Do let me know. Thanks for stopping by. Have a great day!

Tuesday, September 12, 2023

Iris Birthday

 Well, we are almost towards the end of Summer, but I couldn't wait to share this floral card today.


I used the Hero Arts - Color layering Iris stamp set with inks Brutus Monroe Stargazer, Mememto Morocco, Hero Arts Moss and Forever Green. I stamped and fussy cut the flowers and leaves. The oval die cut is from Spellbinders. I die cut the sentiment from Creative Expressions n white card stock and colored it with BM Stargazer ink. The enamel dots are from Altenew.

How do you like this card today. Please do let me know in the comments below. Thank you for stopping by. Have a great day!

Monday, June 12, 2023

Happy Birthday

Hello everyone! I'm on the Craftwell blog sharing a quick and simple girly birthday card.


Visit my blog post here to see how I made this card. Thanks for stopping by. Have a great day!


Saturday, January 21, 2023

Orchids and Rose Birthday Wishes

 Hello everyone! Today I'm sharing a birthday card with Copic colored flowers.


I recently bought this beautiful stamp set from Simon Says Stamp - Orchid Rose Bouquet. It has been on my wishlist for a while now. I wanted to color it as soon as I got it. I inked the image with Ink on 3 ink and colored with Copics. I loved coloring this image. The sentiment is from Creative Expressions - Belated Birthday Wishes die. I trimmed off the 'Belated' part. I added some black rhinestones and matted the panel with black card stock.

What do you think? Do you like this card? Do let me know in the comments. Thanks for stopping by. Have a great day!

Wednesday, July 13, 2022

Peonies And Berries

 Hello everyone!! I have a floral card to share with you today.


I used the Altenew - Peony Bouquet stamp set and stamped the flowers, leaves and berries with Ink on 3 Fadeout ink and colored with copics. I used the colors from the current Altenew Inspiration Challenge colors. The sentiment is from the Altenew Freesia stamp set.

How do you like this card today? Please let me know. Thank you for stopping by. Have a great day!

Submitting this to:

Sunday, June 12, 2022

Hibiscus

 Hello everyone! Today I'm sharing a floral card using stencils.


I had bought this You Are Beautiful stencil set from Altenew few months back. Finally, got a chance to try it today. I don't have the stamp or die that goes along this stencil, I just wanted to try this stencil stand alone. It works so beautifully with ink blending. I added the sentiment from Fresh Freesias stamp set. I die cut the panel with Spellbinders edge dies. I added the green panel as the backing to this panel and added the floral panel on top of it. I also, added a hibiscus on the envelope.

What do you think of this card? Please do let me know in the comments. Thank you for stopping by.

Submitting this to:

Saturday, March 19, 2022

Spring Bouquet

 Hello everyone! I have a copic colored floral card today with a beautiful Spring bouquet.


I won this Simon Says Stamp - Beautiful Bouquet stamp set in a giveaway by Emily Midget, who illustrated this stamp set. She is so talented! I stamped the image with Fadeout ink from Ink on 3 and colored it with copics. The sentiment is also from the same set. I matted the panel with grey card stock. 

How do you like this card today? Please do let me know. Thanks for stopping by. Have a great day.


Monday, March 7, 2022

Bumble Bee Birthday

 Hello everyone!! I'm on the Craftwell blog today, with this shaped card.

I made a hexagon shaped card for my son's 1st birthday. We decided to do a bumble bee theme for his first birthday. I love making the banner and decor for my kids birthdays, this one was no exception. I made this birthday card and tag to go with his gift. I used the Create and Craft Hexagon dies to cut the shaped card. The bumble bee and the other hexagonal lace piece are dies from Spellbinders. I die cut all of these on my SNAP. The sentiment is from Inspired By Stamping. I added a few drops of Nuvo in black. Here's a close up of the card:


The tag uses similar elements, it's just smaller in size.


Here are a few pics of the decor and the cake that I made, from the day.


How do you like my creation today? Do let me know. Thanks for stopping by today. Have a great day!


Sunday, February 27, 2022

Pink Birthday Flowers

 Hello everyone!! I'm back with another card for the Altenew card challenge.

I used the floral image from one of the Thank you cards that I got with an order from Altenew. I colored the image with copics and fussy cut it. I then adhered it on to a white card stock panel. I stamped the sentiment birthday wishes on to it.

How do you like this card? Please do let me know. Thanks for stopping by. Have a great day.

Submitting this to:

Monday, May 24, 2021

Spring Birthday

 Hello everyone!! I'm on the Craftwell blog today, with a Spring birthday card.

I decided to use pastel colors for this Spring card. I've used a bunch of different dies on this one. The flowers were die cut using the Karen Burniston - Pop up Flower Pot die set. I shaped the flowers and added a pearl for the center of the flowers. For the leaves and flourishes, I used the Floral Flourishes die set from Spellbinders. For the sentiment panel, I used the Amazing Paper Grace - Sentimental Christmas die set. The sentiment is from Tubby Craft stamp set. The butterfly is from Crafter's Companion die set. I assembled all the die cuts on an ivory card stock. I think ivory looks better than white for this color scheme. 

Here's another pic of the card. What do you think? Let me know! Thanks for stopping by. Have a great day!

Submitting this to:

Tuesday, April 13, 2021

Birthday Medallion

 Hello everyone!! This month, Altenew is celebrating their 7th birthday. I made a card to celebrate with them. 


I stamped the Arabesque Medallion with grey ink for no-line coloring and colored it with Copic markers. I used the colors from the current Altenew Inspiration Challenge. The sentiment is from Kennedy Grace Stamps - Splendid Roses.


 Happy Birthday Altenew!! Wish you many more successful years!! How do you like my card today? Do let me know in the comments. Thanks for stopping by. Have a great day.

Submitting this to:


Monday, April 12, 2021

Birthday Roses

 Hello everyone!! I'm on the Craftwell blog today, sharing this beautiful birthday card with 3D flowers:


As you might already know, I'm a big fan of Heartfelt Creations flower dies. For these flowers and buds, I used the Tulip Time dies. This die set even has a die for the stalk of the flower. I shaped the flowers with flower shaping tools and used hot glue gun to adhere the layers of the flowers and buds. It makes a difference. I cut a few leaves using the leaf die from the Delicate Asters die set. The beautiful decorative piece on the right, in pink and white is cut using the Decorative Medallion die set, also from HFC. I was so surprised when I was able to cut such a delicate intricate piece in 1 pass on my SNAP machine!! Just amazing!! I arranged the flowers the way I wanted them to be and added some white pollen to the spray. The sentiment is from Inspired By Stamping - Summer Bouquet.


How do you like this card? Please do let me know in the comments. Thanks for stopping by. Have a great day!!

Submitting this to:

Thursday, October 15, 2020

Light up Balloon

 Hello everyone!! I'm on the Craftwell blog today, with a light-up card. Believe it or not, this is my first light-up card and certainly won't be my last :)


I made this for my Dad's birthday. I started by making the card base. I took an A2 card base and adhered a light blue cardstock panel on to it. I folded the top of  the card base in to half, to make the easel. I die cut the hot air balloon using the Sizzix Hot Air Balloon die, on card stock and vellum, using my Cut N Boss. I slightly colored the vellum with Brutus Monroe inks. I sandwiched the lights in between the cardstock and the vellum balloons and adhered it there and then placed the yellow pieces on the balloon. I die cut a few clouds using the die from the same die set. I adhered the switch part of the light behind one of the clouds. I die cut a banner and wrote 'Happy Birthday' since I couldn't find a stamp that would fit in it. I die cut another banner using another stamp set and wrote 'Dear Appa' - Appa is how I call him and it means Dad in our language Tamil. I adhered this banner with foam tape, on the inside of the card and it will serve as the 'stopper' for the easel. Here's a pic of it with the lights on:

And here's one with it flat, ready for the envelope:

How do you like my card today? Please do let me know. Thank you for stopping by. Have a great day.

Wednesday, January 1, 2020

Floral Birthday

Hello everyone!! I'm on the Brutus Monroe blog today, with this floral birthday card.


I stamped the floral background image from the Kind Floral stamp set and colored it with Copics. I enjoyed coloring the background - I love coloring floral images. The sentiment is from the Take Flight stamp set, which I heat embossed with Gilded Embossing powder. I adhered this panel on to an A2 card base.

How do you like my card today? Please do let me know in the comments below. Thanks for stopping by. Have a great day.