Showing posts with label Inspired by Stamping. Show all posts

Saturday, December 9, 2023

Cardinal on the Window

 Hello everyone! Welcome back to my blog! Today I have a tag for Christmas gifts.


I used all supplies from Honey Bee Stamps to make this tag. The cardinal is from the Lovely Layers: Winter Birds die set. I die cut in different shades of red and layered them. The rest of the dies are from Lovely Layers: Seasonal frame. I love this window frame and wanted to make a tag with it. I added gold stickles for the poinsettia center. The sentiment is from Inspired by Stamping - Poinsettia stamp set. I fussy cut the sentiment. I added a golden thread to the tag. 

How do you like this tag? Please let me know in the comments. Thank you for stopping by! Have a wonderful day. 

Saturday, October 14, 2023

Pinecone Wreath Ornament

 Hello everyone! Welcome back to my blog. Today I have Christmas card to share with you!

A week or so back, I took out some of my supplies (stamps and dies) that I haven't used at all or haven't used in a long time and put it on my craft table, hoping to get some inspiration to use them. I love this Hero Arts - Pinecone Wreath stamp, but I wasn't really sure how to use it. I had a few die cuts of the outer ornament part of the Hero Arts - Snowflake Ornament die cut lying around on my table. Deeing that, I thought of making an ornament with this wreath stamped in the center. Initially, I wanted to do a no-line coloring with Copics and stamped the image with Fadeout ink. Then I thought it would be better to use the leaves as is without coloring, so I stamped the image again with Memento green ink. Now the pine cones are also green, but I was able to color on top of it with Copics. I used brown shades to colors the pine cones. Then I ink blended the edges with the same green ink. The sentiment is from an Inspired By Stamping - Poinsettia stamp set, which I heat embossed in gold. For the background, I used Altenew - Deck Planks 3D Embossing Folder. I die cut an ivy vine from Spellbinders - Susan's garden die set. 

How do you like my card today? Please do let me know in the comments below. Thank you for stopping by. Have a great day!

Saturday, September 9, 2023

Blue Snowflakes New Year

 Hello everyone! I have a quick and simple New Year card today.


I used the Inspired By Stamping - Snowflakes stamp set. Even though Inspired By Stamping is closed now, Joanna has the stamp sets in her Etsy shop. I stamped the snowflakes in 3 different teal shades of ink to create the background. The sentiment is from Power Poppy - Glistening Paperwhites stamp set.

How do you like this card? Please do let me know in the comments. Thank you for stopping by. Have a great day!

Friday, September 8, 2023

Lifetime of Love

 Hello everyone! I have a quick and easy 'watercolored' card today.


I used the Inspired By Stamping - Love Sentiments stamp set to make this card. Even though Inspired By Stamping is closed, Joanna has some of the stamp sets on Etsy. This techniques is something Joanna had shared long time back. I stamped the leaves and flowers with distress ink on watercolor card stock and used a wet brush and some more inks to create the watercolored look. Finally added the sentiment from the same stamp set.

How do you like this card? Thanks for stopping by. Have a great day!

Thursday, May 12, 2022

Wisteria Wishes

Hello everyone!! Recently, I bought a few Technique Tuesday Garden club stamps after eyeing them for quite a while. Their florals are simple and stunning! I decided to color the Cascading Flowers with my copic markers, for a no line coloring.


I stamped the wisteria image with Ink on 3 Fadeout ink and colored the image with copics. I then die cut it with Inspired By Stamping Label dies. I embossed a piece of brown card stock with Altenew Deck Planks 3D embossing folder and inked the raised edges with brown ink. I stamped the sentiment from Inspired By Stamping on the floral panel and added it on to the embossed panel.

How do you like my card today? Please do let me know in the comments below. Thank you for stopping by. Have a great day.


Tuesday, April 27, 2021

Daisies Hugs

Hello everyone!! Welcome back to my blog. Today, I have a water-colored card to share with you.


 I stamped the flowers from Inspired By Stamping: Asters stamp set with black ink and water colored them with Chromatek pens. I love these pens and I find that I'm using them quite often now. I used the colors from the Altenew Inspiration Challenge. For the sentiment, I die cut the Hello using the Altenew Fancy Hello die on black card stock. I also stamped the smaller sentiment from the Statement Flower stamp set. I matted the panel with black card stock before adhering it to card base.


How do you like my card today? Please do let me know in the comments below. Thank you for stopping by. Have a great day.

Submitting this to:

Monday, April 12, 2021

Birthday Roses

 Hello everyone!! I'm on the Craftwell blog today, sharing this beautiful birthday card with 3D flowers:


As you might already know, I'm a big fan of Heartfelt Creations flower dies. For these flowers and buds, I used the Tulip Time dies. This die set even has a die for the stalk of the flower. I shaped the flowers with flower shaping tools and used hot glue gun to adhere the layers of the flowers and buds. It makes a difference. I cut a few leaves using the leaf die from the Delicate Asters die set. The beautiful decorative piece on the right, in pink and white is cut using the Decorative Medallion die set, also from HFC. I was so surprised when I was able to cut such a delicate intricate piece in 1 pass on my SNAP machine!! Just amazing!! I arranged the flowers the way I wanted them to be and added some white pollen to the spray. The sentiment is from Inspired By Stamping - Summer Bouquet.


How do you like this card? Please do let me know in the comments. Thanks for stopping by. Have a great day!!

Submitting this to:

Friday, July 31, 2020

Orchid Wishes

Hello everyone!! Welcome back to my blog. Today, I'm sharing a card that I made just because :)


I stamped the orchids from the Inspired By Stamping - Australian Nature I stamp set with grey ink for no-line coloring and colored them with Copics. The sentiment stamp is from Tubby Crafts. 

How do you like my card? Please do let me know in the comments. Thank you for stopping by. Have a great day!!

Saturday, December 7, 2019

Peace, Joy And Love

Hello everyone!! It's been a while since I colored Joanna 's images. So I decided to color this Wreath image that I had.


I took a printout of the Christmas Wreath digital stamp on white card stock with lighter lines for no-line coloring. I colored the image with Copics. Then I heat embossed the sentiment Peace, Joy & Love from one of the older Inspired By Stamping stamp set, with Gilded embossing powder. I matted the panel with Red card stock and adhered it on to an A2 card base. 

How do you like this card today? Please do let me know in the comments. Thank you for stopping by. Have a great day!!

Tuesday, February 26, 2019

Mr & Mrs

Hello everyone!! Today for the Brutus Monroe blog hop, we have the popular Anything Goes theme! Here's what I made for today!


I took a piece of white card stock and blended the Honeysuckle ink over the Elegant egg stencil (which is the current stencil of the month) over the lower half of the card stock. I stamped and embossed the sentiment Mr. & Mrs. from the Rose Border stamp set with Pearl Embossing Powder (which is the current Embossing Powder of the month). Then I die cut it with the label die from Designs By Joanna and blended the Honeysuckle while the die cut is still on the die. That gives a beautiful white border around the blended color. I wrapped a ribbon (from Designs by Joanna) around the card stock and added a bow. I adhered the sentiment label with foam tape. I inked the edges of a card base with Honeysuckle ink and adhered the card panel on to it with glue. I added a few drops of Nuvo drops on it.


Here's the hop order for today:

Daniel
Jess
Lauren
Luisana
Berina
Ashley
Marie

How do you like my card today? Please do let me know in the comments. Thanks for stopping by. Have a great day.

Supplies:

Affiliate links are used
Rose Border
Rose Border

BM
Mini Surface Ink Pad Collection: Floral

BM
Stencil of the Month Club

BM
Embossing Powder of the Month Club

BM
Not Your Mama's Cardstock - Heavyweight

BM
Alabaster 110lb - Premium Cardstock

BM
Card Stock
Card Stock

BM
Glue
Glue

BM
Squeaky Clean Stamp Cleaner

BM
Squeaky Clean Stamp Scrubber

BM
Acrylic Block
Acrylic Block

BM
EK Tools® Small Precision Scissors - 5 inches

BM
Embossing Heat Tool
Embossing Heat Tool

BM
Clear T Square
Clear T Square

BM
Fold and Score Tool
Fold and Score Tool

BM
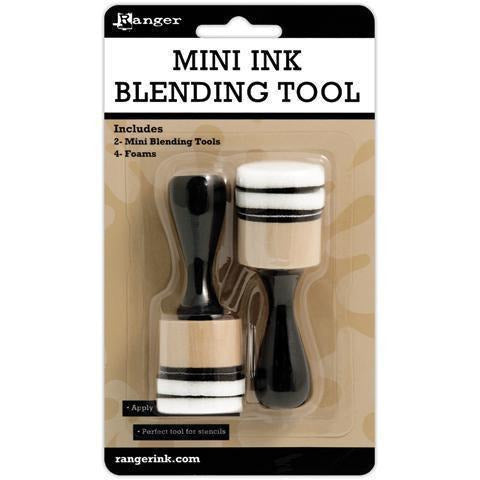
Mini Ink Blending Tool Kit

BM
Mini Ink Blending Tool Replacement Foams - 20 Pieces

BM
3D White Foam Squares • 1/2 in

BM | TW
Thermoweb - Purple Tape

BM | TW
Sticky Tape Mini Runner™

BM | TW
Masking Paper
Masking Paper

BM
Brutus Monroe - Foam Tape - 36 Yards - 108 Feet

BM
Fussy Cutting Scissors

BM


Submitting this to:

Friday, March 9, 2018

Stained Glass Lilies

Hello everyone! I'm on the Craftwell blog today with this lovely card.


I used the Inspired By Stamping - Friends Forever stamp set for the image. I gold embossed it on vellum and colored from behind with Copics. To see more info on how I made this card, please visit my blog post here. Here's another pic:


How do you like this Spring-y card? Thanks for stopping by. Have a great day!

Submitting this to:

Monday, January 15, 2018

I'm Published! - Our Idea Book

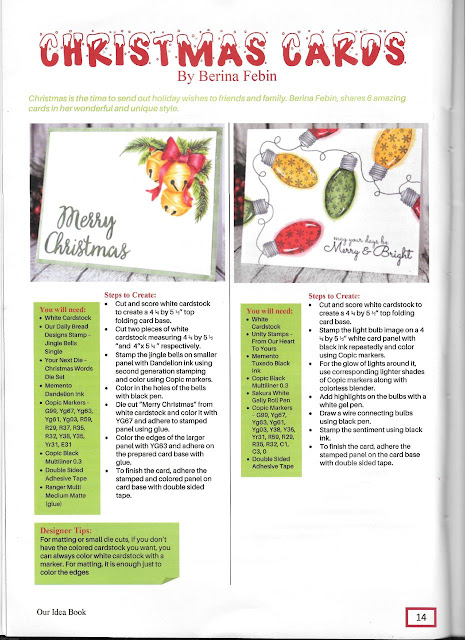
Hello everyone! I'm published! Yay! This time in 6 of my cards were published in the Issue 3 of Our Idea Book. Aaand one of my cards made it to the front cover! 


That's my card on the top right :)


One of cards appeared on the contents page too!


First card was made with Our Daily Bread Designs Jingle Bells stamp and Your Next Stamps die and the second was made with Unity Stamps From Our Heart To Yours.


First card on this page was made with Our Daily Bread Designs Cardinal stamp and Your Next Stamps die. The second one, the one on the cover was made with Stampendous Christmas Cottage stamp and Power Poppy Glistening Paperwhites.


First card in this page was made with Unity Stamps From Our Heart To Yours. Second card was made with Inspired By Stamping Snowflake Wonder.

That's 6 cards! Unfortunately, Our Idea Book has taken a break for now and I'm hope they'll be back soon!

Thanks for stopping by. Have a great day!

Sunday, December 24, 2017

Snowflake Wonder

Hello everyone! First of all, wish you all a very Merry Christmas. Hope you all have a lovely Christmas filled with wonderful memories. I have a simple Christmas card to share with you all today.


I decided to try another card with the Snowflakes stamp set. I took a piece of white cardstock of size 4" x 5.25" and stamped the snowflakes from the Snowflake Wonder stamp set using various shades of blue. I inked the edges of the card base with Distress Ink Broken China. I stamped the sentiment from the same stamp set, die cut it with a die from the Fancy Labels 2 die set and inked it with the Broken China ink while it's still in the die. That creates a beautiful white border around the inked sentiment. I added some ribbon and a bow from the Blue Ribbon Collection. I love how this has turned out.


Thanks for stopping by. Have a great day!

Wednesday, December 20, 2017

Peace, Joy & Love

Hello everyone! How are you today? I have a beautiful Christmas card using Inspired By Stamping Poinsettias.


Ever since I bought the Poinsettias stamp set, I've been itching to use this. I stamped the red part using distredd ink fired brick and the green part using the crushed olive ink and watercolored the images using black soot and fired brick for red and peeled paint and crushed olives for the green. For the background, I used black soot ink. After coloring the images and the background, I gold embossed the center of the poinsettia and the sentiment. I adhered this panel on to a top folding A2 card base with Brutus Monroe glue.


You'll be surprised to know that this card was inspired by a door mat that I saw in one of the club stores. Ha! You never know where and how inspiration strikes you!

Thanks for stopping by. Have a great day.

Thursday, December 14, 2017

Blue Snowflakes

Hello everyone! How are you today? I have a simple thin and tall card using Inspired By Stamping Snowflakes.


I decided to try this thin and tall card that will fit into the regular postal envelope. I used 1 sheet of 8.5" x 11" card stock for this card. I cut the sheet into 8.5" x  7.5" and folded it into half to make the card base. I took the remaining piece of cardstock and stamped the snowflakes from the Snowflake Wonder stamp set using various shades of blue. I inked the edges of the card base with Distress Ink Broken China. I stamped the sentiment from the same stamp set, die cut it with a die from the Fancy Labels 2 die set and inked it with the Broken China ink while it's still in the die. That creates a beautiful white border around the inked sentiment. I added some ribbon and a bow from the Blue Ribbon Collection. I love how this has turned out. I sent this card to my friends at Blitsy and they loved it too!

Thanks for stopping by. Have a great day!